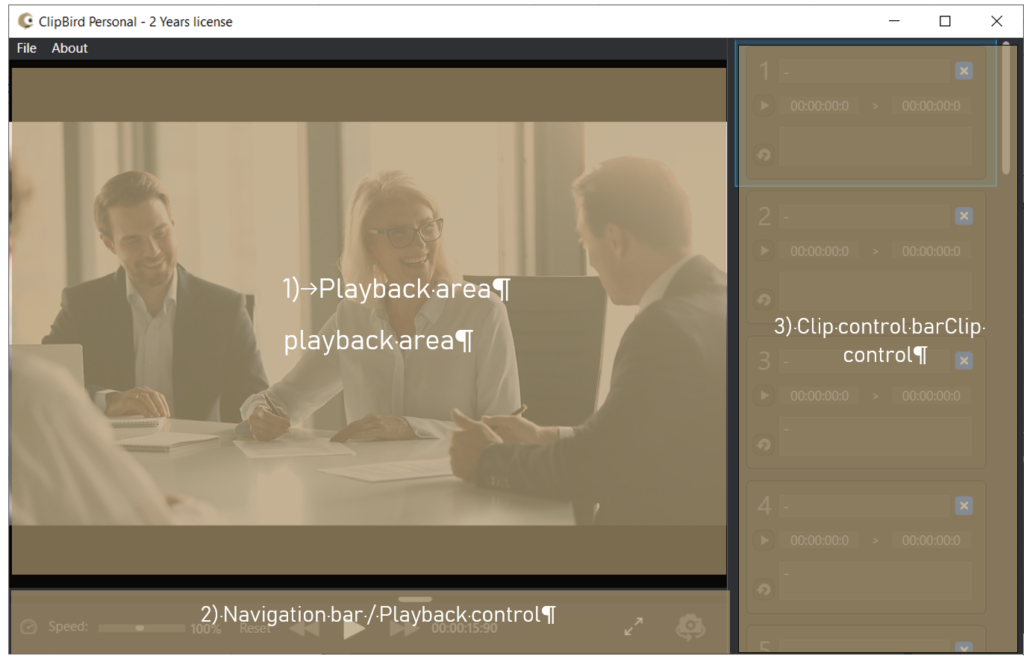
Clipbird’s interface is designed so that you can use all functions at the touch of a button at any time. It is divided into the following three areas:

Compared to the previous version, the user interface has been revised both technically and visually. Nevertheless, the user interface has been kept in such a way that existing users can easily make the changeover.
Playback area
The Playback Area displays the loaded video or still image.
Navigation bar
Here you can play, fast-forward, rewind and pause the video with the usual controls. The Play button automatically switches to the Pause button once the video has started.


With the slider on the left side of the navigation bar the playback speed can be adjusted from 1% – 200%. By clicking „Reset“ the playback speed is resetted to 100%.

Shows or hides the clip list.

360° rotation of the clip

Browse clip titles and notes.

Zoom
When the mouse pointer is over the playback area (1), the video can be zoomed in and out by turning the center scroll wheel of the mouse.
Clip control bar
Use the Clip Control Bar to organize your clips and control their playback at the touch of a button. Eighteen different clips/still images can be defined.

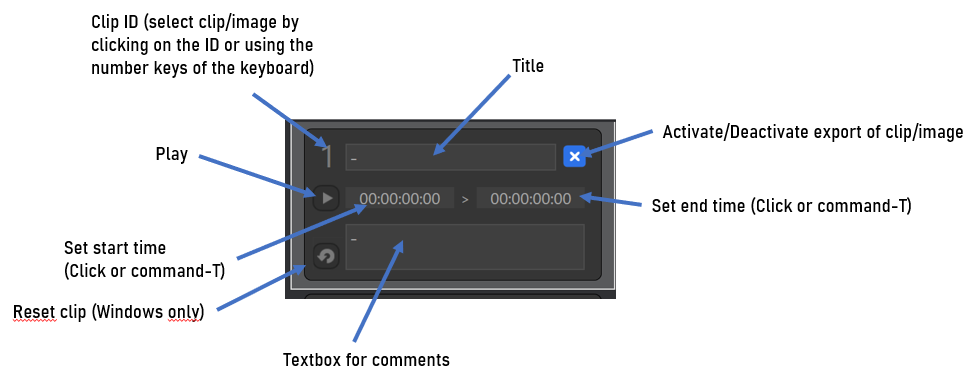
Title of the clip/still picture
Define a short, concise title for the clip
Clip ID
By pressing the corresponding digit, the desired clip can be selected.
Starting the clip
This plays only the selected clip. Alternatively, this can also be achieved by pressing the space bar.
Setting the start time
A click in this field sets the start time of the clip. The end time is automatically set to the same value for still images.
Resetting the clip
All settings of the selected clip are removed.
Text field for notes
Text notes for the selected clip can be stored here. These also appear in PDF Export.
Setting the end time
A click in this field sets the end time of the clip
Enable / disable clip for export
Clips can be excluded or included from the PDF export.
