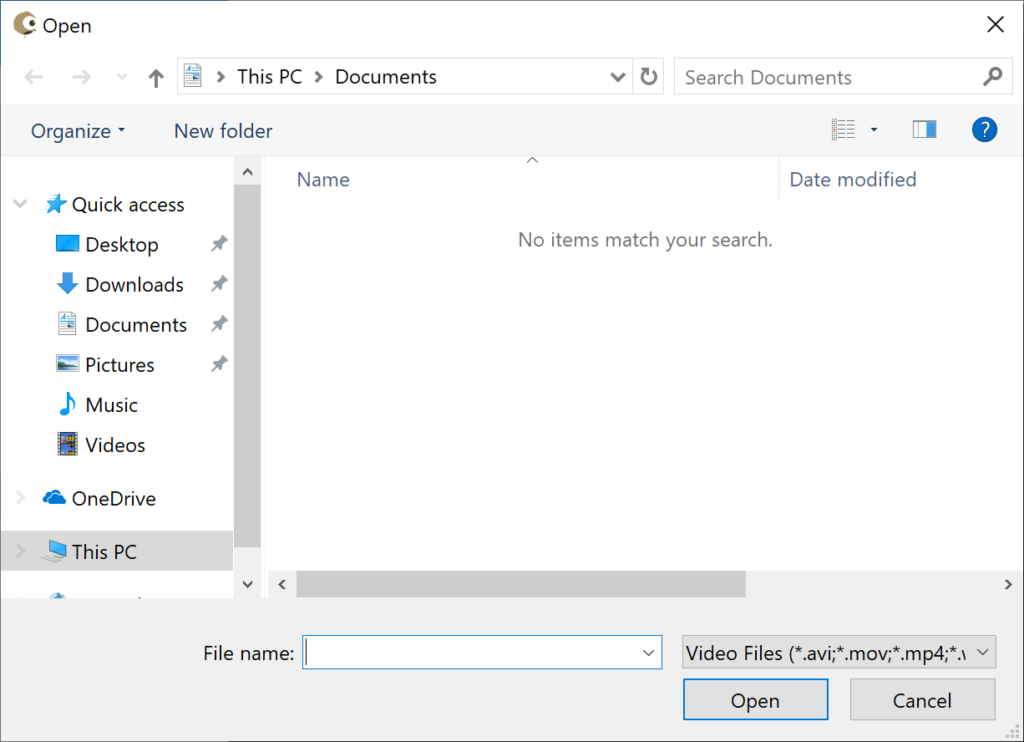
Load a video by clicking on the „Load Video“ button in the File menu or by dragging the video directly to Clipbird using „Drag & Drop“.
Navigate to the desired video. Note that you can use the drop-down menu in the lower right corner to display either all files or only those with known video file extensions.
The video is loaded.
Now you can navigate in the video as usual with the controls Slider, Play/Pause and Back and Forward button and set the playback speed (1% – 200%).
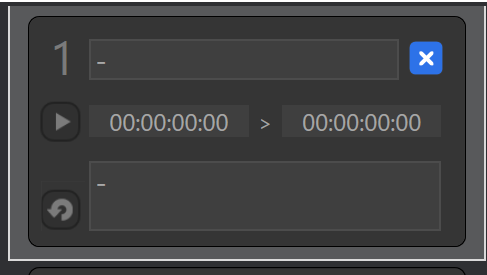
Set the start time of a clip:
For a free clip, click on the left of the two time fields (Start button).
A click on the Start button always sets both start and end time to the sametime.
This allows you to define a still image with one click.
If you want to change the start timestamp later, please right-click on the start button.
Navigate through the video to the desired end of the clip, pause playback and confirm the end button at this point to define the end of the clip.
Enter a title.
Information about the active clip can be entered in the notes field.
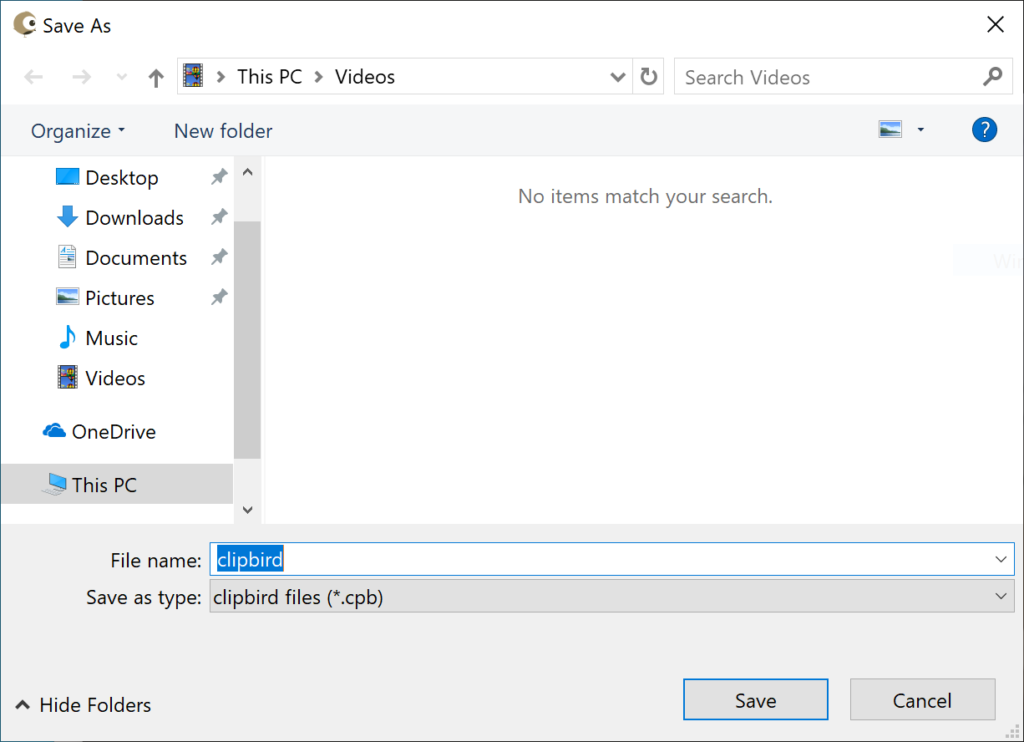
Once you have defined all clips, you can export these settings. Clickon the „Save project“ button in the „File“ menu.
You will be prompted to select a location and name for the export file. Please leave the extension of the file as default on cpb. It is best to add the cpb files to the respective video file. The cpb file contains a reference to the respective video file.
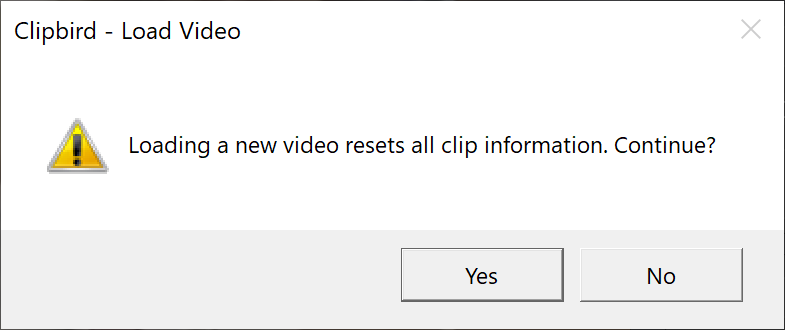
When loading new videos or projects, a security prompt appears to prevent data loss.